No one wants to experience the embarrassment and potential injuries that come with slipping on wet or greasy floors. That’s why it’s crucial to invest in shoes that offer superior traction and grip. But with countless brands and models available, how can you tell if a pair of shoes is truly non-slip? This guide will take you through the key features to look for, from specialized outsole materials to innovative tread patterns. We’ll also discuss the importance of industry certifications and standards to ensure the reliability of slip-resistant claims. Get ready to walk with confidence and peace of mind as we unveil the secrets to identifying non-slip shoes.
How to tell if shoes are non-slip:
- Check the outsole material – non-slip shoes usually have rubber or synthetic outsoles with a tread pattern for better traction.
- Look for a non-slip rating or certification, such as ASTM F2913-11.
- Inspect the shoe’s design – non-slip shoes often have a wider base and supportive features.
- Read customer reviews or ratings to see if others have mentioned the shoes being non-slip.

How to Tell If Shoes Are Non-Slip
When it comes to selecting the right shoes for certain activities or work environments, one important factor to consider is slip resistance. Non-slip shoes are designed with special outsoles that provide improved traction and grip, reducing the risk of slipping and falling. Whether you work in a restaurant kitchen, hospital, or any other place where slip hazards are common, knowing how to determine if shoes are non-slip is essential. In this article, we will guide you through the process of identifying non-slip shoes, ensuring you make a safe and informed choice.
Look for the Slip-Resistant Marking
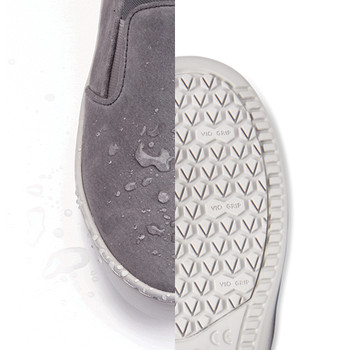
One of the easiest ways to identify non-slip shoes is to look for the slip-resistant marking. Most reputable shoe manufacturers include a specific symbol or label on the shoe’s outsole to indicate its slip-resistant properties. This marking is typically a shoeprint with a series of lines or patterns, signifying its ability to provide traction on slippery surfaces. When shopping for shoes, pay close attention to the outsole and look for this marking as a clear indication that the shoe is designed to be slip-resistant.
However, it’s important to note that not all slip-resistant shoes have the same level of effectiveness. Different shoes are designed for specific types of environments and slip hazards. For example, shoes designed for restaurant workers may have a different slip-resistant rating compared to those intended for healthcare professionals. Therefore, it’s crucial to consider the specific requirements of your workplace when choosing non-slip shoes.
Check the Material and Tread Pattern
Another way to determine if shoes are non-slip is by examining the material and tread pattern of the outsole. Slip-resistant shoes are typically made from rubber or a similar material that offers excellent traction. Rubber outsoles are known for their grip on various surfaces and are commonly used in non-slip shoe designs. Additionally, the tread pattern on the outsole plays a crucial role in providing slip resistance. Look for shoes with deep and multidirectional treads, as they are more effective in preventing slips and falls.
It’s worth noting that the material and tread pattern alone may not guarantee slip resistance. Factors such as wear and tear, surface conditions, and the presence of oil or water can affect the shoe’s slip-resistant properties. Regular maintenance and proper cleaning of non-slip shoes are essential to ensure their continued effectiveness. Be sure to follow the manufacturer’s recommendations for care and maintenance to optimize the slip-resistant capabilities of your shoes.
Consider Independent Testing and Reviews
If you want further assurance that a pair of shoes is truly non-slip, consider looking for independent testing or reading reviews from reputable sources. Various organizations conduct slip-resistant testing on shoes and provide certifications or ratings based on their performance. These certifications can be valuable indicators of a shoe’s slip-resistant capabilities. Additionally, checking reviews from other customers who have already purchased the shoes can provide valuable insights into their effectiveness in real-world scenarios.
When relying on reviews, make sure to consider multiple sources to get a well-rounded understanding of the shoe’s slip-resistant qualities. Pay attention to comments about the shoe’s grip on different surfaces and whether users experienced any slips or falls while wearing them. By considering independent testing and reviews, you can make a more informed decision when selecting non-slip shoes.
Inspect for Other Safety Features
Besides slip resistance, it’s important to consider other safety features that may be necessary for your specific work environment. Some non-slip shoes come with additional features such as reinforced toe caps, electrical hazard protection, or waterproofing. Assess your workplace’s requirements and regulations to determine if any additional safety features are necessary. By considering these factors, you can ensure that your non-slip shoes not only provide excellent traction but also meet all the necessary safety standards.
Remember, slip-resistant shoes are designed to reduce the risk of slips and falls, but they are not foolproof. It’s crucial to remain vigilant and practice safe habits while wearing non-slip shoes. Be aware of your surroundings, watch out for potential hazards, and take necessary precautions to maintain your safety at all times.
Frequently Asked Questions
Are you looking for non-slip shoes to ensure safety in your workplace or daily activities? Here are some commonly asked questions about how to tell if shoes are non-slip, along with detailed answers to help you make an informed decision.
1. How can I determine if a pair of shoes is non-slip?
Non-slip shoes are designed with specific features to provide better traction and prevent slipping. To determine if a pair of shoes is non-slip, look for a visible pattern or texture on the sole. These patterns often consist of small, raised dots or lines that increase friction with the ground. Additionally, non-slip shoes may also be labeled as “slip-resistant” or “grip-enhancing.” Keep in mind that not all shoes with textured soles are non-slip, so it’s important to check for additional features or certifications.
Furthermore, some non-slip shoes undergo specific tests to measure their slip resistance. Look for shoes that meet industry standards, such as ASTM F2913-11, which evaluates the coefficient of friction between the shoe and different surfaces. These certified shoes have undergone rigorous testing to ensure their slip-resistant properties.
2. Can I rely solely on the appearance of the sole to determine if shoes are non-slip?
While the appearance of the sole can provide some indication of slip resistance, it’s not the sole factor to consider. Many non-slip shoes have a clear and subtle textured pattern, making it difficult to identify their slip-resistant qualities based on appearance alone. To ensure accuracy, it’s essential to look for additional indicators, such as shoe labels or certifications that explicitly state slip resistance.
Rather than solely relying on visual cues, consider reading product descriptions or reviews to gather information about a shoe’s slip-resistant features. Manufacturers often provide detailed specifications and test results, giving you a better understanding of the shoe’s performance on different surfaces.
3. Are all non-slip shoes suitable for all environments?
While non-slip shoes are designed to enhance traction and reduce the risk of slipping, not all shoes are suitable for every environment. Different industries and activities may require specific types of non-slip shoes. For example, shoes designed for restaurant workers may have additional features like resistance to oil and grease spills.
Consider the specific environment in which you’ll be using the shoes and look for features that cater to those conditions. If you work in a hospital, shoes with non-slip soles that are also easy to clean and disinfect may be more suitable. Assessing your needs and the demands of your environment will help you choose the right pair of non-slip shoes.
4. Can I wear non-slip shoes for daily activities outside of work?
Absolutely! Non-slip shoes are not limited to workplace use only. They can be beneficial for various daily activities, such as hiking, walking on slippery surfaces, or even during rainy weather. Non-slip shoes provide an extra layer of safety by reducing the risk of accidental slips and falls.
When selecting non-slip shoes for everyday use, consider comfort, durability, and style in addition to their slip-resistant qualities. Look for shoes that offer all-day comfort and support, as well as a design that matches your personal style preferences.
5. How often should I replace non-slip shoes?
The lifespan of non-slip shoes depends on several factors, including frequency of use, intensity of activity, and overall wear and tear. It’s important to regularly inspect your non-slip shoes for signs of deterioration, such as worn-out soles, reduced traction, or visible damage. These signs indicate that it may be time to replace your shoes.
On average, non-slip shoes should be replaced every six months to a year for optimal performance. However, it’s crucial to assess the condition of your shoes regularly and replace them sooner if necessary. Investing in new non-slip shoes when needed ensures your safety and maintains the effectiveness of the slip-resistant features.
In conclusion, being able to identify non-slip shoes is crucial for ensuring safety and preventing accidents in various settings. By paying attention to the sole material, tread design, and certification labels, individuals can confidently choose footwear that provides the necessary traction on slippery surfaces. Additionally, seeking advice from professionals and reading customer reviews can further enhance one’s ability to distinguish non-slip shoes from regular ones.
It is worth emphasizing that investing in non-slip shoes is not only beneficial for personal safety but also for the well-being of others. Whether you work in the hospitality industry, healthcare sector, or simply want to navigate slippery environments with confidence, having the right footwear is essential. By following the guidelines outlined in this guide and staying informed about advancements in shoe technology, individuals can make informed decisions that prioritize safety and minimize the risk of accidents caused by slippery surfaces. Remember, when it comes to non-slip shoes, prevention is always better than a painful slip and fall.
]]>From everyday sneakers to trendy slip-ons, canvas shoes come in a variety of styles and designs, making them a versatile choice for any occasion. However, the tightness that comes with breaking in a new pair or the natural shrinkage that occurs over time can make wearing canvas shoes a painful experience. But fear not! With a few simple steps and some handy tricks, you can easily stretch your canvas shoes to provide the perfect fit for your feet. So, whether you’re a fashion enthusiast looking to salvage a tight-fitting pair of canvas shoes or a practical individual hoping to extend the life of your favorite pair, this guide will equip you with the knowledge and techniques to stretch canvas shoes effectively. Get ready to step into comfort and style with confidence!
How to Stretch Canvas Shoes:
- Put on a pair of thick socks and wear the canvas shoes.
- Use a hairdryer to warm up the tight areas for a few minutes.
- While the shoes are still warm, walk around in them for about 10-15 minutes.
- Repeat this process until the shoes start to stretch and feel more comfortable.
- Alternatively, you can use a shoe stretcher or stuff the shoes with wet newspaper overnight.

How to Stretch Canvas Shoes
In this article, we will guide you through the process of stretching canvas shoes to provide a more comfortable fit. Whether your canvas shoes are new and need some breaking in or you’ve realized they are slightly too tight, stretching them can be an effective solution. By following these step-by-step instructions, you’ll be able to stretch your canvas shoes and enjoy a more comfortable wearing experience.
Step 1: Preparation
Before you begin stretching your canvas shoes, gather the necessary materials. You will need a pair of thick socks, a hairdryer, and your canvas shoes. Put on the thick socks as they will help to stretch the shoes more effectively. It’s important to note that this method works best for canvas shoes with rubber soles or synthetic materials. If your canvas shoes have leather soles, it’s advisable to seek professional help to avoid damaging the shoes.
Once you have the materials ready, put on the thick socks and wear your canvas shoes. Walk around in them for a few minutes to identify the areas that feel tight or uncomfortable. This will help you focus on stretching those specific areas during the stretching process.
Step 2: Applying Heat
Using heat is an effective way to stretch canvas shoes. Start by setting your hairdryer to medium heat. Aim the heat at the areas of the shoes that feel tight or uncomfortable. Move the hairdryer around in a circular motion, ensuring that the heat is evenly distributed. You should heat the shoes for about 2-3 minutes to soften the canvas material.
While heating the shoes, continue wearing them with the thick socks. This will allow the shoes to stretch more effectively. As the canvas material becomes more pliable, you will notice that it starts to loosen up. Be careful not to overheat the shoes, as this can cause damage to the material. Once you have heated the shoes sufficiently, turn off the hairdryer and let them cool down for a few minutes while still wearing them.
Step 3: Finalizing the Stretch
After the shoes have cooled down slightly, remove the thick socks and try walking around in them again. You should notice a difference in the fit, with the shoes feeling more comfortable and less tight. If you still feel some areas that need further stretching, repeat the heating process for those specific areas. Remember to be cautious and not overheat the shoes.
Once you are satisfied with the fit of your canvas shoes, take them off and let them cool down completely. This will help the shoes retain their new shape. It’s recommended to wear the shoes without the thick socks for a few hours to allow them to adjust to your feet. By following these steps, you can successfully stretch your canvas shoes and enjoy a more comfortable wearing experience.
Frequently Asked Questions
Here are some commonly asked questions about how to stretch canvas shoes:
1. How can I stretch canvas shoes that are too tight?
If your canvas shoes feel too tight, there are a few methods you can try to stretch them out. One method is to wear thick socks and then put on your shoes. Use a hairdryer to warm up the tight areas while flexing your feet and toes. This will help to loosen the canvas material and allow it to stretch more easily. Another option is to use a shoe stretcher, which can be inserted into the shoe to stretch it out gradually over time.
It’s important to note that these methods may not work for all canvas shoes, and excessive stretching can potentially damage the material. It’s always a good idea to test a small area of the shoe first and proceed with caution.
2. Can I stretch canvas shoes using water?
Yes, you can try stretching canvas shoes using water. One method is to dampen a pair of thick socks with water and wear them with your shoes. The moisture will help to soften the canvas material, allowing it to stretch more easily. As you wear the shoes, the damp socks will gradually reshape them to fit your feet better.
However, it’s important to be cautious when using water to stretch canvas shoes, as excessive moisture can cause the material to warp or shrink. It’s best to start with a small amount of water and monitor the stretching process closely to avoid any damage to your shoes.
3. Are there any other household items I can use to stretch canvas shoes?
Yes, there are a few household items that you can use to stretch canvas shoes. One option is to fill a plastic bag with water and place it inside the shoe, making sure it fills out the tight areas. Then, put the shoes in the freezer overnight. As the water freezes, it expands and stretches the canvas material. Once the shoes have thawed, remove the bag and try them on to see if they fit better.
Another method is to stuff the shoes with damp newspaper or socks and let them sit overnight. The moisture from the newspaper or socks will help to stretch the canvas material. Just make sure to remove the newspaper or socks before wearing the shoes again.
4. Can I take my canvas shoes to a professional to be stretched?
Yes, you can take your canvas shoes to a professional shoe repair shop to be stretched. They have specialized stretching machines and techniques that can safely stretch your shoes without causing any damage. This option is especially recommended if you have expensive or delicate canvas shoes that you want to preserve.
Keep in mind that professional stretching services may come at a cost, so it’s a good idea to inquire about the price before proceeding. Additionally, it’s always a good idea to provide the shoe repair shop with any specific instructions or concerns you may have regarding the stretching process.
5. How long does it usually take to stretch canvas shoes?
The time it takes to stretch canvas shoes can vary depending on the method used and the tightness of the shoes. Some methods, such as wearing thick socks or using a shoe stretcher, may yield gradual results that require multiple attempts over a few days or weeks. Other methods, such as using water or freezing, can provide quicker stretching, but caution must be taken to prevent damage to the shoes.
It’s important to be patient when stretching canvas shoes and not rush the process. Check the fit regularly and stop stretching once the shoes feel comfortable. Remember that excessive stretching can lead to permanent damage, so it’s better to take it slow and steady.

In conclusion, learning how to stretch canvas shoes can be a game-changer for those of us who have struggled with uncomfortable footwear. By following these simple steps, you can not only increase the comfort of your canvas shoes but also extend their lifespan. Whether you have a pair of new shoes that need a bit of adjustment or an old favorite that has become tight over time, these techniques will help you achieve the perfect fit.
Remember, as with any shoe-stretching method, patience and caution are key. Take your time, follow the instructions carefully, and don’t rush the process. With a little effort and the right techniques, you can transform your canvas shoes into a comfortable and well-fitting pair that will keep your feet happy for years to come. So go ahead, give it a try, and experience the joy of walking in shoes that feel like they were made just for you.
]]>Paragraph 2: Stretching suede shoes requires a delicate touch and a thorough understanding of the material’s unique properties. With the right techniques, you can achieve a customized fit that molds perfectly to your feet, without causing any damage. From using common household items to employing professional tools, we will cover a range of methods to suit your needs and preferences. Additionally, we will address common concerns, such as potential risks and how to avoid them, ensuring that you can confidently tackle the stretching process. So, whether you’re a long-time suede shoe enthusiast or a novice looking to explore this luxurious footwear option, join us as we dive into the art of stretching suede shoes, opening up a world of possibilities for your footwear collection.
How to Stretch a Suede Shoe:
- Put on a pair of thick socks and wear the suede shoes for a few hours each day to gradually stretch them.
- Try using a shoe stretcher specifically designed for suede shoes. Insert the stretcher into the shoe and adjust it to stretch the desired areas.
- Alternatively, you can fill a plastic bag with water, place it inside the shoe, and put the shoe in the freezer overnight. As the water freezes, it expands and stretches the shoe.
- Apply a small amount of leather conditioner or rubbing alcohol to the tight areas of the shoe, then use your fingers to gently stretch the suede.
- Repeat the stretching process as needed until the shoes fit comfortably.

How to Stretch a Suede Shoe
Stretching a suede shoe can be a delicate process, as suede is a delicate material that requires special care. However, with the right techniques and tools, you can safely stretch your suede shoes for a more comfortable fit. This step-by-step guide will walk you through the process of stretching your suede shoes without causing any damage.
Step 1: Gather the necessary materials
Before you begin, make sure you have all the materials you’ll need for the stretching process. You will need a shoe stretcher, which can be purchased from a shoe repair shop or online. Additionally, you will need a spray bottle filled with water, a clean cloth, and a suede brush. Having these materials on hand will ensure that you can effectively stretch your suede shoes.
Step 2: Prep your shoes
Start by lightly spraying the inside of your suede shoes with water. Be careful not to saturate the material, as this can cause water stains. Once the shoes are slightly damp, insert the shoe stretcher into the shoe and adjust it to your desired width. Make sure the stretcher is positioned evenly to avoid distorting the shape of the shoe. Leave the stretcher in place for at least 24 hours to allow the suede to stretch.
Step 3: Massage the suede
After removing the shoe stretcher, gently massage the suede with your hands. This will help to further stretch the material and ensure a more comfortable fit. Be sure to apply even pressure and avoid pulling or tugging on the suede, as this can cause damage. If you encounter any tight spots, focus on massaging those areas to alleviate any discomfort.
Step 4: Brush the suede
Using a suede brush, gently brush the suede in one direction to restore its natural texture and remove any residue. This will help to maintain the appearance of the suede and keep it looking fresh. Brushing the suede regularly will also help to prevent it from becoming matted or worn-looking over time.
Step 5: Test the fit
Once you have completed the stretching process, try on your suede shoes to assess the fit. They should feel more comfortable and have a bit more give than before. If they still feel too tight, you can repeat the stretching process or try using a shoe stretching spray specifically designed for suede shoes.
Step 6: Maintain your suede shoes
After stretching your suede shoes, it’s important to properly care for them to ensure their longevity. Avoid wearing them in wet or muddy conditions, as moisture can damage the suede. Use a suede protector spray to create a barrier against stains and spills. Regularly brush your suede shoes to keep them looking clean and fresh. With proper care, your stretched suede shoes will continue to provide you with comfort and style for years to come.
Frequently Asked Questions
Suede shoes are known for their luxurious and delicate texture. However, they can sometimes feel tight or uncomfortable. Stretching suede shoes can help alleviate this issue and make them more comfortable to wear. Here are some frequently asked questions about how to stretch suede shoes:
1. How can I stretch my suede shoes?
There are a few methods you can try to stretch your suede shoes. One method is to use a shoe stretcher specifically designed for suede shoes. Apply a stretching spray or conditioner to the inside of the shoe to soften the material, then insert the shoe stretcher and gradually expand it to stretch the shoe. Another method is to stuff the shoes with damp newspaper or socks and leave them overnight. As the moisture evaporates, it will expand the suede, making it more pliable. You can also wear thick socks and use a hairdryer on a medium heat setting to help stretch the shoes.
It’s important to note that these methods may not work for all suede shoes, especially if they are made of a particularly delicate or thin suede. It’s always a good idea to test any stretching method on a small, inconspicuous area of the shoe first to avoid any potential damage.
2. Can I stretch my suede shoes without a shoe stretcher?
Yes, it is possible to stretch suede shoes without a shoe stretcher. One method is to wear the shoes with thick socks and use a hairdryer on a medium heat setting to warm up the suede. While the suede is warm, flex your feet and toes to help stretch the material. Repeat this process a few times until you achieve the desired stretch. Another method is to stuff the shoes with damp newspaper or socks and leave them overnight. As the moisture evaporates, it will expand the suede, making it more pliable.
Keep in mind that stretching suede shoes without a shoe stretcher may not provide as precise or controlled results as using a stretcher. Additionally, some stretching methods may not be suitable for all types of suede, so it’s important to exercise caution and test any method on a small, inconspicuous area first.
3. How much can suede shoes be stretched?
The amount suede shoes can be stretched depends on various factors, including the quality and thickness of the suede, the shoe’s construction, and the stretching method used. In general, suede shoes can stretch up to half a size or even a full size with the right stretching techniques. However, it’s important to stretch suede shoes gradually and not force them to stretch too much, as it can lead to irreversible damage or deformation of the material.
If you’re unsure about how much to stretch your suede shoes, it’s best to consult a professional shoe repair specialist who can provide guidance based on the specific characteristics of your shoes.
4. Are there any risks associated with stretching suede shoes?
While stretching suede shoes can be an effective way to improve their fit and comfort, there are some risks involved. Applying too much force or using improper stretching methods can damage the suede, causing it to become misshapen, cracked, or even torn. It’s crucial to always proceed with caution when stretching suede shoes and to test any stretching method on a small, inconspicuous area of the shoe first.
Additionally, stretching may not always be successful in achieving the desired fit, especially if the shoes are made of a particularly delicate or thin suede. It’s important to assess the overall condition of the shoes before attempting to stretch them and consider consulting a professional if you’re unsure about the best course of action.
5. How can I maintain the shape of my stretched suede shoes?
After successfully stretching your suede shoes, it’s essential to take steps to maintain their shape. One way to do this is by using shoe trees made specifically for suede shoes. These shoe trees help to preserve the shape of the shoe while also absorbing any excess moisture. Another tip is to store your suede shoes in a cool, dry place away from direct sunlight, as heat and sunlight can cause the suede to shrink or become discolored.
Regular cleaning and conditioning of suede shoes can also help maintain their shape and prevent them from shrinking or becoming misshapen. Use a suede brush or eraser to remove dirt and stains, and apply a suede conditioner to keep the material supple and prevent it from drying out. Following these care and maintenance practices will help ensure that your stretched suede shoes retain their shape and last for a long time.

In conclusion, learning how to properly stretch a suede shoe is essential for anyone who wants to enjoy maximum comfort and longevity from their favorite footwear. By following the steps outlined in this guide, you can safely and effectively stretch your suede shoes to achieve the perfect fit without compromising their quality.
Remember, patience is key when stretching suede shoes. Take your time, follow the instructions carefully, and avoid rushing the process. With proper care and attention, your suede shoes will mold to the shape of your feet, providing unparalleled comfort and style for years to come. So don’t hesitate to give your favorite pair of suede shoes a little extra room to breathe and enjoy the perfect fit you deserve.
]]>Sliding feet can be a nuisance, not only causing discomfort but also affecting your confidence and overall well-being. It’s frustrating to constantly adjust your feet, sacrificing your focus and enjoyment in daily activities. We understand the struggle, which is why we have compiled a comprehensive set of strategies to address this common issue. From understanding the root causes of foot sliding to implementing practical solutions, this guide will equip you with the knowledge and tools needed to keep your feet firmly in place. Get ready to bid farewell to blisters and discomfort, and say hello to a more comfortable and confident stride.
How to stop foot from sliding forward in shoes:
- Choose shoes with the right fit and proper sizing.
- Consider using shoe inserts or insoles for added support.
- Try using heel grips or pads to prevent your foot from sliding forward.
- Use antiperspirant or foot powder to reduce moisture and friction.
- Adjust the lacing or straps of your shoes for a snug fit.
- Consider using adhesive strips or inserts specifically designed to prevent foot sliding.

How to Stop Foot from Sliding Forward in Shoes
In order to prevent your foot from sliding forward in shoes, there are several steps you can take to ensure a comfortable and secure fit. Whether you’re wearing heels, flats, or athletic shoes, these tips will help keep your foot in place and prevent discomfort or injury.
Choose the Right Shoe Size
The first and most important step in preventing foot sliding is to make sure you’re wearing the correct shoe size. Ill-fitting shoes can easily lead to foot movement and discomfort. Start by measuring your feet properly to determine your true shoe size. Remember that foot size can change over time, so it’s important to measure each time you purchase new shoes. When trying on shoes, pay attention to the fit around your heel and the amount of space in the toe box. A snug fit around the heel will help prevent your foot from sliding forward, while a roomy toe box will allow your toes to move comfortably without feeling cramped.
Additionally, consider the type of shoe you’re wearing. Different shoe styles may fit differently, so it’s important to try on different brands and styles to find the ones that work best for your feet. If you find that your feet are consistently sliding forward in a specific type of shoe, it may be worth trying a different brand or style that provides a more secure fit.
Use Inserts or Cushions
If you’re still experiencing foot sliding even with properly fitting shoes, using inserts or cushions can provide additional support and help keep your foot in place. There are various types of inserts available, such as heel grips, insoles, and gel pads, that can help fill any gaps between your foot and the shoe. These inserts not only provide extra cushioning and support, but they can also create a tighter fit and prevent your foot from sliding forward. Make sure to choose inserts that are specifically designed for the type of shoe you’re wearing and follow the instructions for proper placement.
Another option is to use adhesive strips or tapes on the inside of the shoe. These can be placed strategically to create friction and reduce slipping. However, be cautious when using adhesive products, as they may leave residue or damage the shoe material. Test them on a small area first to ensure they are suitable for your shoes.
Consider Lacing Techniques
The way you lace your shoes can also make a difference in preventing foot sliding. Consider using different lacing techniques that provide a more secure fit. For example, the “lock lacing” technique involves creating a loop with the laces at the middle of the shoe and then crossing them over each other before threading them through the loop. This creates a tighter fit around the foot and can help prevent slipping. Additionally, tightening the laces around the ankle can provide extra support and stability.
Experiment with different lacing techniques to find the one that works best for your foot shape and shoe style. Be sure not to lace the shoes too tightly, as this can restrict blood flow and cause discomfort.
Keep Your Feet Dry
Sweaty feet can contribute to foot sliding, especially in shoes made of materials that don’t provide much traction. To prevent excessive moisture, make sure to keep your feet dry before putting on your shoes. You can use foot powder or antiperspirant on your feet to reduce sweating. Wearing moisture-wicking socks can also help keep your feet dry and minimize friction. Avoid wearing shoes without socks, as this can increase the likelihood of sliding.
Additionally, consider using shoe liners or insoles made of moisture-wicking materials. These can help absorb sweat and keep your feet dry throughout the day, reducing the chances of foot sliding.
Conclusion
In conclusion, preventing foot sliding in shoes is all about finding the right fit and adding extra support when needed. Start by choosing the correct shoe size and trying on different styles to find the ones that provide a secure fit. Use inserts or cushions to fill any gaps and create a tighter fit. Experiment with lacing techniques to increase stability, and keep your feet dry to reduce sliding caused by sweat. By following these steps, you can ensure a comfortable and secure fit for your feet, preventing discomfort and potential injury.
Frequently Asked Questions
Here are some common questions about how to stop your foot from sliding forward in shoes.
Q: Why does my foot slide forward in shoes?
There can be several reasons why your foot slides forward in shoes. The most common reason is that the shoes are too big for you, or they don’t fit properly. If the shoes are too wide or have a large toe box, your foot may not be held securely in place. Additionally, worn-out shoe insoles or lack of arch support can cause your foot to move forward.
Another reason for foot sliding can be sweaty feet. When your feet sweat, the moisture can make your foot slide inside the shoe, especially if the shoe material is smooth or slippery. It is important to address these issues to prevent discomfort and potential foot problems.
Q: How can I prevent my foot from sliding forward in shoes?
To prevent your foot from sliding forward in shoes, you can try the following methods:
1. Use heel grips or inserts: These can be placed at the back of the shoe to provide extra grip and prevent your foot from slipping forward.
2. Wear thicker socks: Thicker socks can create a snugger fit and reduce the movement of your foot inside the shoe.
3. Use arch support inserts: Inserts with arch support can help stabilize your foot and prevent it from sliding forward.
4. Adjust lacing: Properly lacing your shoes can provide a tighter fit and prevent your foot from sliding forward.
5. Consider shoe inserts or insoles: Inserts or insoles designed specifically to prevent foot sliding can be used to create a better fit and reduce movement.
Q: Can I use adhesive pads to stop my foot from sliding forward?
Yes, adhesive pads can be a helpful solution to stop your foot from sliding forward in shoes. These pads, also known as heel grips or shoe liners, are typically made of a sticky material that adheres to the inside of the shoe. They provide extra grip and help keep your foot in place. Make sure to choose pads that are specifically designed for this purpose and follow the instructions for proper application.
It’s worth noting that adhesive pads may not be suitable for all types of shoes or foot conditions, so it’s advisable to consult with a shoe specialist if you have any concerns.
Q: Are there any specific shoe styles that prevent foot sliding?
While there are no specific shoe styles that guarantee a complete prevention of foot sliding, certain features can help minimize the issue. Look for shoes with a secure closure system, such as laces, straps, or buckles, as these can provide a tighter fit and reduce movement.
Additionally, shoes with a contoured or cushioned insole can help keep your foot in place and provide better support. Avoid shoes with a wide or oversized toe box, as they may allow your foot to slide forward more easily.
Q: What if none of the methods work for me?
If you have tried various methods to prevent your foot from sliding forward in shoes without success, it may be beneficial to consult with a podiatrist or a shoe fitting expert. They can assess your foot structure and recommend specific solutions tailored to your needs. Custom orthotics or special shoe modifications may be necessary in some cases to ensure a comfortable and secure fit.
Remember that everyone’s feet are unique, and finding the right solution may require some trial and error. Don’t hesitate to seek professional advice if you’re experiencing persistent issues.

In conclusion, preventing your foot from sliding forward in shoes is a common issue that many individuals face. However, with the right techniques and products, you can effectively address this problem and enjoy a comfortable and secure fit. By implementing strategies such as using anti-slip inserts, adjusting lacing techniques, and opting for shoes with a better fit, you can ensure that your feet stay in place and avoid the discomfort and potential injuries associated with foot sliding. Remember, investing in the right footwear and taking proactive measures to address this problem will not only provide immediate relief but also contribute to your overall foot health in the long run.
So, whether you’re an athlete looking for stability during intense workouts, a professional seeking comfort during long work hours, or simply someone who wants to enjoy a day out without worrying about foot sliding, these tips and tricks will help you achieve the desired outcome. Take the time to experiment with different methods and find what works best for you. With a little effort and attention to detail, you’ll be able to bid farewell to foot sliding and step confidently into a world of comfort and convenience.
]]>Starting a shoe company may seem like a daunting task, but with the right strategies and a solid foundation, you can navigate the industry with confidence. From conducting market research to crafting a unique brand identity, we will delve into the intricacies of the shoe business and share valuable tips on how to stand out in a crowded market. So, if you’re ready to step into the world of entrepreneurship and leave your mark on the fashion industry, let’s get started on this exciting journey together!
How to Start a Shoe Company:
- Research the market and identify your target audience.
- Create a business plan outlining your goals and strategies.
- Secure funding for your shoe company through investors or loans.
- Register your business and obtain the necessary licenses and permits.
- Source high-quality materials and manufacturers for your shoe production.
- Develop a strong brand identity and marketing strategy.
- Design and produce your shoe prototypes.
- Test and refine your shoe designs based on feedback.
- Establish distribution channels and partnerships.
- Launch your shoe company and continue to innovate and grow.
How to Start a Shoe Company
Starting your own shoe company can be an exciting and rewarding venture. However, it requires careful planning and execution to ensure success in a competitive market. In this article, we will provide you with a step-by-step guide on how to start your own shoe company, from developing your brand to manufacturing and marketing your products.
1. Define Your Brand and Target Market
The first step in starting a shoe company is to define your brand and identify your target market. What makes your shoes unique? Are they stylish, eco-friendly, or comfortable? Determine the key features and values that will set your brand apart from competitors. Additionally, consider who your ideal customers are and what their preferences and needs are in terms of footwear.
Research the market to identify any gaps or opportunities that your shoe company can fill. This will help you position your brand effectively and tailor your products to meet the demands of your target market.
2. Create a Business Plan
A well-thought-out business plan is essential for starting any company, including a shoe company. It serves as a roadmap that outlines your goals, strategies, and financial projections. Your business plan should include:
Market Analysis: Provide an overview of the footwear market, including size, trends, and competitors. Identify your target market and explain how your products will meet their needs.
Product Line: Detail the types of shoes you plan to offer, including materials, designs, and price points. Explain how your product line will differentiate itself from existing options.
Marketing and Sales Strategy: Outline your marketing and sales tactics, including online and offline channels. Describe how you will promote your brand and reach your target audience.
Operations and Manufacturing: Explain how you will source materials, manufacture shoes, and manage inventory. Include details on production costs, quality control measures, and distribution channels.
Financial Projections: Provide a forecast of your revenue, expenses, and profitability over the next few years. Include a breakdown of startup costs and funding sources.
3. Secure Funding
Starting a shoe company can require significant upfront investment. Once you have a solid business plan, you can approach potential investors or seek funding from banks or financial institutions. Be prepared to present your business plan and demonstrate the market potential and viability of your shoe company.
In addition to external funding, consider personal savings or loans to finance your startup. Explore crowdfunding platforms as an alternative means of raising capital.
4. Set Up Your Operations
With funding secured, it’s time to set up your shoe company’s operations. This includes finding a suitable location for your office and production facility, as well as establishing relationships with suppliers and manufacturers. Consider factors such as cost, proximity to suppliers, and availability of skilled labor.
Additionally, ensure that you comply with all legal and regulatory requirements. Obtain the necessary permits and licenses to operate your shoe company legally.
5. Develop and Manufacture Your Products
Work closely with designers and manufacturers to develop prototypes and samples of your shoe designs. Test and refine these samples to ensure they meet your quality standards and align with your brand’s vision.
Once the designs are finalized, proceed with manufacturing on a larger scale. Establish a reliable supply chain to ensure a steady flow of materials and timely production.
Implement quality control measures to maintain consistent product quality and address any manufacturing issues promptly.
6. Launch and Market Your Brand
When your products are ready, it’s time to launch your shoe company and start marketing your brand. Create a compelling brand identity, including a memorable logo and brand story. Develop a comprehensive marketing strategy that includes online and offline channels.
Utilize social media platforms, influencer marketing, and collaborations to increase brand awareness and reach your target market. Consider participating in trade shows or fashion events to showcase your products to a wider audience.
Monitor the performance of your marketing campaigns and make adjustments as needed to optimize results and maximize sales.
7. Continuously Innovate and Adapt
As your shoe company grows, it’s important to continuously innovate and adapt to evolving market trends. Stay updated on the latest fashion and footwear trends and gather customer feedback to improve your products and customer experience.
Invest in research and development to introduce new designs, materials, or technologies that set your brand apart from competitors. Regularly analyze your sales data and adjust your product offerings and marketing strategies accordingly.
By staying proactive and responsive to market changes, you can ensure the long-term success and sustainability of your shoe company.
Frequently Asked Questions
Here are some common questions about starting a shoe company:
1. How do I come up with a unique and marketable shoe design?
Designing a unique and marketable shoe requires a combination of creativity, market research, and understanding customer preferences. Start by researching current trends in the footwear industry and identifying any gaps or opportunities. This will help you understand what customers are looking for in a shoe. Next, let your creativity flow and come up with innovative and visually appealing designs that stand out from the competition.
Once you have some design ideas, consider conducting focus groups or surveys to gather feedback from potential customers. This will help you refine your designs and ensure that they meet the needs and preferences of your target market. Remember, a successful shoe design not only looks good but also offers comfort, functionality, and durability.
2. How can I find reliable suppliers for shoe materials?
Finding reliable suppliers for shoe materials is crucial for the success of your shoe company. Start by researching reputable suppliers online or attending industry trade shows where you can meet potential suppliers in person. Look for suppliers that have a good reputation, experience in the industry, and a wide range of high-quality materials.
When evaluating suppliers, consider factors such as their pricing, lead times, minimum order quantities, and their ability to provide consistent quality. It’s also important to establish clear communication channels with your suppliers to ensure smooth operations and timely delivery of materials. Building strong relationships with your suppliers can also result in better prices and more reliable service in the long run.
3. How do I market and promote my shoe brand?
Marketing and promoting your shoe brand is essential to create awareness and generate sales. Start by defining your target audience and understanding their preferences and buying behavior. This will help you tailor your marketing strategies to effectively reach and engage your potential customers.
Utilize various marketing channels such as social media, online advertising, influencer collaborations, and traditional print media to create a consistent brand image and reach your target market. Build an attractive and user-friendly website to showcase your shoe collection and provide a seamless online shopping experience. Consider partnering with fashion bloggers or influencers to increase your brand’s visibility and credibility.
Additionally, participate in industry trade shows, fashion events, and collaborate with local retailers to gain exposure and expand your customer base. Offering promotions, discounts, or limited edition releases can also help generate buzz and attract customers to your shoe brand.
4. How can I ensure the quality of my shoes?
Ensuring the quality of your shoes is crucial for customer satisfaction and the long-term success of your shoe company. Start by selecting reliable manufacturers or production facilities that have a track record of producing high-quality shoes. Conduct thorough due diligence and visit the facilities in person if possible to assess their production processes and quality control measures.
Establish clear quality standards and specifications for your shoes and communicate them to your manufacturers. Regularly monitor and inspect the production process to ensure that the shoes are being made according to your specifications. Conduct quality control checks on the finished products to identify any defects or issues before they reach the market.
It’s also important to listen to customer feedback and address any quality concerns promptly. Implementing a robust customer service system and offering warranties or guarantees can help build trust with your customers and ensure their satisfaction with your shoes.
5. How can I effectively manage the finances of my shoe company?
Effective financial management is essential for the success and growth of your shoe company. Start by creating a comprehensive business plan that includes a detailed budget, projected sales, and expenses. This will help you understand your financial needs and set realistic goals for your company.
Track your expenses and revenues regularly to monitor your financial performance and make informed decisions. Consider using accounting software or hiring an accountant to ensure accurate record-keeping and financial reporting.
When it comes to funding your shoe company, explore various options such as self-funding, loans, or seeking investors. Carefully evaluate the pros and cons of each option and choose the one that aligns with your financial goals and risk tolerance.
Lastly, regularly review and adjust your financial strategies as your shoe company grows. Seek professional advice if needed to ensure your financial management practices are optimized for success.

How to Start Your Own Sneaker Brand, Plus the History of Nike & adidas | From the Ground Up
In conclusion, starting a shoe company requires a combination of passion, strategic planning, and a deep understanding of the market. By following the steps outlined in this guide, aspiring entrepreneurs can embark on a rewarding journey towards building their own successful shoe brand. Remember to conduct thorough market research, develop a unique brand identity, and establish strong relationships with suppliers and manufacturers. Additionally, prioritize quality and innovation to stand out in a competitive industry. With determination and perseverance, starting a shoe company can be a fulfilling endeavor that allows individuals to express their creativity and make a mark in the fashion world.
While the road to starting a shoe company may be challenging, it is also filled with endless opportunities for growth and success. By leveraging the power of online platforms, social media, and other marketing channels, entrepreneurs can reach a wide audience and build a loyal customer base. It is crucial to continuously adapt and evolve in response to changing consumer preferences and market trends. Building a strong team and fostering a positive company culture are also key factors in the long-term success of a shoe company. Remember, Rome wasn’t built in a day, and it may take time to establish a solid foundation. However, with the right mindset, dedication, and a clear vision, starting a shoe company can be a fulfilling and rewarding journey.
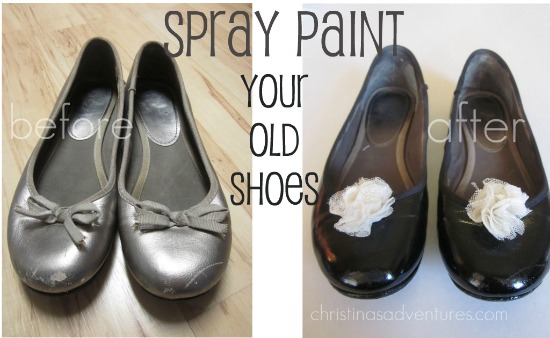
]]>The beauty of spray painting shoes lies in its versatility. From bold and vibrant designs to subtle ombre effects, the possibilities are endless. Whether you’re a seasoned artist or a complete beginner, this guide will provide you with the tips and tricks you need to achieve professional-looking results. So grab your paint cans, prepare your workspace, and get ready to embark on a creative journey that will leave you with a one-of-a-kind pair of shoes that are sure to turn heads wherever you go. Let’s dive into the world of spray painting shoes and unleash your artistic potential!
- Clean the shoes thoroughly with soap and water to remove any dirt or debris.
- Tape off any areas you don’t want to be painted using painter’s tape.
- Apply a coat of primer to the shoes to help the paint adhere better.
- Choose your desired color and spray evenly over the shoes, holding the can about 6-8 inches away.
- Allow the shoes to dry completely before applying additional coats of paint if desired.
- Once the paint is dry, remove the painter’s tape and any excess paint.
- Finish by applying a clear sealant to protect the paint job.

How to Spray Paint Shoes
Spray painting shoes is a great way to give them a fresh new look and add a personal touch to your footwear. Whether you want to customize a pair of plain white sneakers or transform an old pair of shoes, spray painting can help you achieve the desired effect. This step-by-step guide will walk you through the process of spray painting shoes, ensuring professional results with a touch of creativity.
Step 1: Prepare the Shoes
Before you begin spray painting, it’s important to properly prepare the shoes to ensure a smooth and even finish. Start by cleaning the shoes thoroughly with a mild soap and water. Use a soft brush or cloth to remove any dirt or debris. Once the shoes are clean, allow them to dry completely. This will ensure that the paint adheres properly to the surface of the shoes.
Next, use masking tape to cover any areas of the shoes that you don’t want to paint. This could include the soles, rubber parts, or any other specific areas you wish to keep unpainted. Make sure the tape is securely attached to prevent any paint from seeping through.
Step 2: Choose the Right Paint
When it comes to spray painting shoes, it’s important to select the right type of paint. Look for a high-quality spray paint specifically designed for use on fabric or leather. These paints provide better adhesion and flexibility, ensuring a long-lasting finish. Additionally, choose a color that complements your style and the overall look you want to achieve.
Before applying the paint to the shoes, test it on a small inconspicuous area to ensure it adheres well and dries to the desired color. This will help you avoid any unexpected results or damage to the shoes. Once you’re satisfied with the test, you can proceed to the next step.
Step 3: Apply the Paint
Now it’s time to start spray painting your shoes. Begin by shaking the paint can vigorously for a few minutes to ensure the paint is well mixed. Hold the can about 6-8 inches away from the shoes and apply a thin, even layer of paint. Start with light strokes, gradually building up the color intensity as needed.
Allow the first coat to dry completely according to the manufacturer’s instructions. Once dry, apply additional coats as necessary to achieve the desired color and coverage. Remember to let each coat dry before applying the next one. This will help prevent smudging or unevenness in the final result.
Step 4: Seal the Paint
After you’re satisfied with the color and coverage, it’s important to seal the paint to protect it and ensure it lasts. Choose a clear sealant specifically designed for use on painted shoes. Apply a thin, even layer of sealant over the painted surface, making sure to cover all areas. This will help prevent the paint from chipping or peeling over time.
Allow the sealant to dry completely before wearing or handling the shoes. This will ensure that the paint and sealant have fully cured, providing maximum durability. Once the shoes are dry, remove the masking tape carefully to reveal the finished painted design.
Step 5: Enjoy Your New Shoes
Now that you’ve successfully spray painted your shoes, it’s time to enjoy your unique and customized footwear. Wear them with confidence and show off your creativity. Remember to take proper care of your painted shoes by avoiding excessive rubbing or scratching to maintain their vibrant appearance for as long as possible.
With the right preparation, paint, and technique, you can easily transform any pair of shoes into a work of art. So grab your supplies, unleash your creativity, and start spray painting your way to a stylish and personalized shoe collection!
Frequently Asked Questions
Here are some commonly asked questions about how to spray paint shoes:
Can I spray paint any type of shoe?
Yes, you can spray paint most types of shoes, including canvas, leather, and synthetic materials. However, it’s important to note that the results may vary depending on the material. Canvas shoes tend to absorb the paint better, while leather shoes may require additional preparation and a specific type of paint. It’s always a good idea to do a small test patch on a hidden area of the shoe before proceeding with the full paint job.
Do I need to prepare the shoes before spray painting?
Yes, it’s crucial to prepare the shoes properly before spray painting. Start by cleaning the shoes thoroughly with a mild soap and water solution to remove any dirt, oils, or stains. Let them dry completely before proceeding. For leather shoes, you may need to use a leather cleaner and conditioner to ensure the paint adheres properly. Additionally, you should tape off any areas you don’t want to paint, such as the soles or laces.
What type of spray paint should I use?
For fabric or canvas shoes, it’s best to use acrylic-based spray paint specifically designed for textiles. These paints are flexible, durable, and won’t crack or peel. When painting leather shoes, opt for a paint specifically made for leather or a high-quality acrylic-based paint. It’s important to choose a paint that is compatible with the material of your shoes to achieve the best results.
How do I achieve an even and smooth finish?
To achieve an even and smooth finish, it’s recommended to apply thin and even coats of paint. Start with a light base coat, allowing it to dry completely before applying additional coats. Hold the can about 6-8 inches away from the shoe and use smooth, sweeping motions to apply the paint. Avoid spraying too close or in one spot for too long, as this can result in drips or uneven coverage. Patience and multiple thin coats will help you achieve a professional-looking finish.
How do I protect the paint on my newly painted shoes?
After the paint has dried and cured for at least 48 hours, it’s a good idea to protect the paint on your newly painted shoes. You can do this by applying a clear sealant or finisher specifically designed for use on shoes. This will help protect the paint from chipping, peeling, or rubbing off. Follow the instructions on the sealant product carefully, and apply it in thin, even coats. Allow each coat to dry completely before applying additional layers. Properly protecting the paint will help ensure that your newly transformed shoes last longer.
In conclusion, mastering the art of spray painting shoes can not only elevate your style but also unleash your creativity in a whole new way. By following the step-by-step guide provided, you can transform a plain pair of shoes into a unique fashion statement that reflects your personality and individuality. From selecting the right materials and preparing the shoes to applying the paint and adding finishing touches, this process allows you to unleash your inner artist and create a one-of-a-kind masterpiece.
Remember, practice makes perfect, and don’t be discouraged if your first attempt doesn’t turn out exactly as planned. Experiment with different techniques and colors, and allow your imagination to take flight. With patience and determination, you’ll soon be able to proudly showcase your customized shoes to the world, turning heads and inspiring others to explore their own artistic endeavors.
So, why settle for ordinary when you can transform your footwear into extraordinary? Don’t be afraid to take a leap and try your hand at spray painting shoes – you may just discover a hidden talent and a newfound passion for expressing yourself through art and fashion. Embrace the process, enjoy the journey, and let your creativity shine through every brushstroke. Get ready to step out in style and leave a lasting impression wherever you go.
]]>Shoes are not just a functional accessory; they are a reflection of our personal style and attention to detail. A well-maintained pair of shoes can make a powerful impression and elevate any outfit. However, the traditional method of shining shoes with polish can be time-consuming and requires specific products. That’s where our guide comes in handy – we will take you through a step-by-step process of transforming your shoes from dull to dazzling without the need for any polish. Whether you have an important event coming up or simply want to give your shoes some extra love and care, this guide will equip you with the knowledge and techniques to achieve a professional shine.
How to Shine Shoes Without Polish:
- Start by cleaning your shoes with a soft cloth to remove any dirt or dust.
- Next, mix equal parts white vinegar and water in a small bowl.
- Dip the cloth into the vinegar solution and gently rub it onto the shoes in circular motions.
- Afterward, use a dry cloth to buff the shoes and remove any excess moisture.
- Finally, finish by applying a small amount of olive oil or petroleum jelly to add shine and protect the leather.

How to Shine Shoes Without Polish
Shining your shoes is an essential part of maintaining their appearance and prolonging their lifespan. While polish is commonly used to achieve a high shine, there are alternative methods for those who don’t have access to polish or prefer a more natural approach. In this article, we will guide you through the steps to shine your shoes without polish, using simple household items and techniques.
Gather the Necessary Supplies
Before you begin, make sure you have all the supplies you need to shine your shoes effectively. Here’s a list of what you’ll need:
- Clean cloth or rag
- Warm water
- White vinegar
- Baking soda
- Cotton balls
- Old toothbrush
- Olive oil
- Soft-bristled brush
Once you have gathered these items, you’re ready to start shining your shoes without polish.
Clean the Shoes
The first step in achieving a shine without polish is to thoroughly clean your shoes. Start by removing any loose dirt or debris by gently brushing the surface with a soft-bristled brush. Next, mix a solution of warm water and a small amount of white vinegar. Dampen a clean cloth or rag with the solution and gently wipe down the entire surface of the shoes. This will help remove any stubborn stains or residue.
If your shoes have scuff marks or tough stains, create a paste by mixing baking soda with a small amount of water. Apply the paste to the affected areas using an old toothbrush, and gently scrub until the stains are removed. Once the shoes are clean, use a damp cloth to wipe off any excess residue.
Condition the Leather
After cleaning, it’s important to condition the leather to keep it moisturized and prevent cracking. Apply a small amount of olive oil to a clean cloth or cotton ball, and rub it gently onto the surface of the shoes in circular motions. Make sure to cover the entire shoe, paying extra attention to areas that tend to dry out, such as the toe cap and heel.
Allow the olive oil to absorb into the leather for about 30 minutes. Then, use a clean cloth to remove any excess oil and buff the shoes to a nice shine. The olive oil not only conditions the leather but also helps bring out its natural luster.
Final Touches
To finish off the shine, use a clean cloth or rag to buff the shoes in quick, circular motions. This will help remove any remaining oil residue and bring out the shine. For an extra glossy finish, you can also use a cotton ball dipped in a small amount of water to lightly dampen the surface of the shoes before buffing.
Remember to let the shoes dry completely before wearing them to avoid any potential staining. With these simple steps, you can achieve a polished and professional look for your shoes without using traditional polish.
Frequently Asked Questions
Here are some commonly asked questions about how to shine shoes without polish:
Q: Can I shine my shoes without using polish?
A: Yes, you can shine your shoes without using polish. There are alternative methods that can help restore shine to your shoes. One method is to use a mixture of water and vinegar. Simply dampen a cloth with the mixture and gently rub it over the surface of your shoes. Another method is to use a banana peel. Rub the inside of the peel on your shoes, then buff with a soft cloth. These methods can help bring back some shine to your shoes without the need for polish.
However, it’s important to note that while these methods can provide temporary shine, they may not offer the same long-lasting results as using shoe polish. If you’re looking for a more durable shine, it’s recommended to use shoe polish in addition to these alternative methods.
Q: How can I remove scuff marks from my shoes without polish?
A: Scuff marks can be unsightly on shoes, but you don’t necessarily need polish to remove them. One method is to use a pencil eraser. Gently rub the eraser over the scuff mark until it starts to fade. You can also try using a mixture of baking soda and water. Make a paste with the two ingredients and apply it to the scuff mark. Let it sit for a few minutes, then wipe it off with a damp cloth. These methods can help remove scuff marks without the need for polish.
However, keep in mind that these methods may not completely eliminate deep scuff marks. For more stubborn scuffs, it may be necessary to use a specialized shoe cleaner or polish for better results.
Q: How can I make my shoes shine using household items?
A: If you don’t have shoe polish on hand, there are several household items that can help you achieve a shine on your shoes. One option is to use olive oil. Apply a small amount of olive oil to a soft cloth and rub it onto your shoes in a circular motion. This can help add shine and nourish the leather. Another option is to use a mixture of lemon juice and cream of tartar. Apply the mixture to your shoes and let it sit for a few minutes before wiping it off with a clean cloth. These household items can provide a temporary shine to your shoes.
However, it’s important to note that these methods may not offer the same long-lasting shine as using shoe polish. If you want a more durable shine, it’s recommended to use shoe polish in addition to these household items.
Q: Can I use a hairdryer to shine my shoes?
A: While a hairdryer can help dry your shoes after cleaning, it is not recommended to use it as a tool for shining shoes. The high heat from the hairdryer can potentially damage the leather or other materials of your shoes. It’s best to stick to using shoe polish, alternative methods, or household items to shine your shoes.
If you’re looking for a quick way to remove wrinkles or creases from your shoes, you can try using a hairdryer on a low or medium heat setting. Hold the hairdryer a few inches away from your shoes and gently move it back and forth to help smooth out any wrinkles.
Q: Can I use a banana to shine my shoes?
A: Yes, you can use a banana to shine your shoes. The inside of a banana peel contains natural oils that can help add shine to leather shoes. Simply rub the inside of the banana peel over your shoes, then buff with a soft cloth. This method can provide a temporary shine to your shoes without the need for polish.
However, it’s important to note that the shine achieved with a banana may not be as long-lasting as using shoe polish. If you’re looking for a more durable shine, it’s recommended to use shoe polish in addition to the banana method.

In conclusion, learning how to shine shoes without polish can be a handy skill to have in your repertoire. Whether you find yourself in a pinch without any polish or simply prefer a more natural approach, there are several effective methods to achieve a polished and lustrous shine. From using common household items like vinegar, olive oil, or even a banana peel, to employing traditional techniques such as buffing with a soft cloth or toothbrush, there are various options to suit your needs and preferences.
By exploring these alternative methods, you not only save money on expensive shoe polishes, but also contribute to a more sustainable lifestyle by reducing your reliance on chemical products. Additionally, mastering the art of shining shoes without polish allows you to maintain the appearance and longevity of your footwear, ensuring that they always look their best. So, whether you’re preparing for an important event or simply want to spruce up your everyday shoes, these techniques provide a practical and eco-friendly solution. Next time you find yourself in need of a quick shoe shine, remember that polishing your shoes can be achieved without the use of traditional polishes – all it takes is a little creativity and resourcefulness.
]]>First and foremost, let’s talk about the importance of finding the right fit for your Peloton shoes. Ill-fitting shoes can lead to discomfort and even potential injuries during your rides. To begin, ensure that you have the correct shoe size. Peloton shoes tend to run true to size, so it’s recommended to order your regular shoe size. However, keep in mind that the fit may vary depending on the brand, so it’s always a good idea to check the sizing chart provided by Peloton. Once you have your shoes, it’s time to adjust the cleats to your specific needs. Cleat position is crucial for optimizing power transfer and preventing any strain on your joints. By following the simple instructions provided in this guide, you’ll be able to set up your Peloton shoes correctly, allowing you to crush your workouts with confidence and comfort.
How to Set Up Peloton Shoes:
- Unbox your Peloton shoes and remove any packaging materials.
- Insert the cleats into the designated slots on the bottom of the shoes and tighten the screws using the provided Allen wrench.
- Put on the shoes and adjust the fit using the Velcro straps or BOA closure system.
- Connect the shoes to your Peloton bike by sliding them into the toe cages and securing them with the straps.
- Once properly set up, make sure the shoes are securely attached before starting your workout.
How to Set Up Peloton Shoes
Are you excited to start your Peloton journey but unsure how to set up your Peloton shoes? Look no further! In this step-by-step guide, we will walk you through the process of setting up your Peloton shoes, ensuring a comfortable and efficient workout experience.
Step 1: Unboxing and Checking the Contents
When your Peloton shoes arrive, begin by carefully unboxing them. Inside the box, you should find the shoes, cleats, and any additional accessories. Take a moment to inspect the contents and ensure that everything is included and in good condition. If you notice any missing or damaged items, contact Peloton customer support for assistance.
Once you have confirmed that all the necessary components are present, move on to the next step.
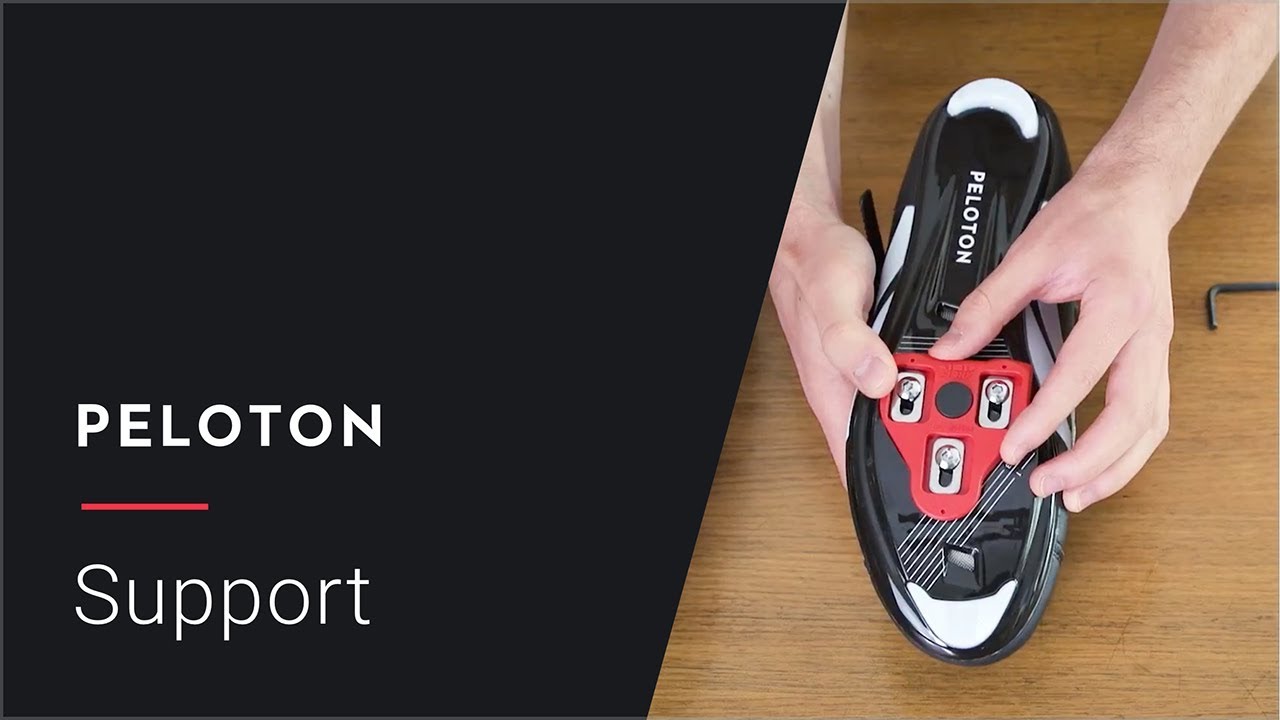
Step 2: Installing the Cleats
Now that you have verified the contents, it’s time to install the cleats on your Peloton shoes. Start by locating the cleat mounting holes on the sole of each shoe. The holes are usually marked with an arrow or indicator, making them easy to identify.
Next, take the cleats and align them with the mounting holes. Ensure that the cleats are positioned correctly and securely fastened. You can use an Allen wrench or a similar tool to tighten the screws and secure the cleats in place. Repeat the process for the second shoe.
Step 3: Adjusting the Fit
With the cleats installed, it’s time to adjust the fit of your Peloton shoes. Put on the shoes and fasten the closures, whether they are Velcro straps, laces, or a combination of both. Make sure the shoes feel snug but not overly tight.
If the shoes have adjustable features, such as a BOA dial or straps, experiment with different settings to find the most comfortable fit for your feet. Remember that proper fit is essential for optimal performance and to prevent discomfort or injury during your workouts.
Step 4: Testing and Fine-Tuning
Now that you have set up your Peloton shoes, it’s time to give them a test run. Step onto your Peloton bike and clip your shoes into the pedals. Take a moment to ensure that the shoes are securely engaged with the cleats and that you feel stable and supported.
If you experience any issues or discomfort during the test ride, make any necessary adjustments. This may include tightening or loosening the cleats, readjusting the fit of the shoes, or experimenting with different pedal settings. The goal is to find the perfect setup that suits your individual needs and preferences.
Step 5: Maintenance and Care
Lastly, it’s important to maintain and care for your Peloton shoes to ensure their longevity. After each workout, wipe down the shoes with a clean, damp cloth to remove any sweat or dirt. Allow them to air dry before storing them in a cool, dry place.
Regularly inspect the cleats and fastenings for any signs of wear or damage. If you notice any issues, such as loose screws or worn-out components, replace them promptly to maintain the integrity of your setup.
By following these steps and taking proper care of your Peloton shoes, you can enjoy a comfortable and successful workout experience every time you hop on your Peloton bike.
Frequently Asked Questions
Here are some commonly asked questions about how to set up Peloton shoes:
How do I set up my Peloton shoes?
To set up your Peloton shoes, start by finding a comfortable and well-lit area to work in. Begin by removing any existing pedals from your bike. Then, take the Peloton shoe cleats and attach them to the bottom of your shoes according to the instructions provided. Next, locate the pedals on your Peloton bike and align the cleats with the pedal clips. Press down firmly to engage the shoes with the pedals. Finally, adjust the fit of the shoes by tightening or loosening the straps or dials, ensuring a snug and secure fit for your ride.
It is important to note that proper setup and adjustment may require some trial and error to find the most comfortable and efficient position for your feet. Take the time to experiment and make any necessary adjustments to enhance your overall riding experience.
Can I use my own cycling shoes with Peloton?
Yes, you can use your own cycling shoes with Peloton. If you already have a pair of compatible cycling shoes, you can attach Peloton shoe cleats to the soles and use them with the Peloton bike. This allows you to have a consistent and familiar feel when riding. Make sure to check the compatibility of your shoes and ensure that the cleats are properly installed before using them with the Peloton bike.
Using your own cycling shoes can be especially beneficial if you have specific fit requirements or if you prefer a particular brand or style of shoes. It can also be a cost-effective option if you already own cycling shoes and do not wish to purchase a new pair specifically for Peloton workouts.
How do I adjust the shoe cleats for a proper fit?
Adjusting the shoe cleats for a proper fit is an essential step in setting up Peloton shoes. Start by locating the bolts on the cleats that attach them to the soles of your shoes. Using an appropriate wrench or tool, loosen the bolts to allow for adjustments. Position the cleats on the shoes in a way that feels comfortable and natural for your feet. Consider factors such as foot angle, arch support, and overall alignment.
Once you have found the desired position, tighten the bolts securely to prevent any movement during rides. It is important to note that slight adjustments may be necessary over time as you become more accustomed to the shoes and learn what works best for your individual riding style and foot anatomy.
How should Peloton shoes fit?
Peloton shoes should fit snugly and securely, providing proper support and stability during rides. When putting on the shoes, make sure your feet are properly aligned and centered within the shoes. The shoes should feel comfortably snug around your feet, with no excessive pressure or discomfort. The closure system, whether it be straps, dials, or laces, should be adjusted to achieve a secure fit without causing any restriction or pain.
A proper fit is crucial for an optimal riding experience. Ill-fitting shoes can lead to discomfort, hot spots, or even injuries. Take the time to adjust the fit of your Peloton shoes before each ride, ensuring that they provide the necessary support and comfort for your feet.
What are the benefits of using Peloton shoes?
Using Peloton shoes offers several benefits for your cycling workouts. Firstly, they are specifically designed for compatibility with Peloton bikes, ensuring a seamless connection between your feet and the pedals. This allows for efficient power transfer and a more immersive riding experience.
Peloton shoes also provide enhanced stability and support, thanks to their stiff soles and secure fit. This can help improve your pedaling efficiency and reduce the risk of foot fatigue or discomfort during longer rides. Additionally, using Peloton shoes allows you to take full advantage of the Peloton bike’s metrics and features, such as cadence tracking and accurate power output measurements.
In conclusion, setting up your Peloton shoes is a straightforward process that can greatly enhance your indoor cycling experience. By following the step-by-step instructions provided by the manufacturer, you can ensure that your shoes are properly fitted and securely attached to the bike’s pedals. This not only improves your comfort and safety during workouts but also maximizes the efficiency of your pedal strokes.
Remember, investing a little time and effort in correctly setting up your Peloton shoes can make a world of difference in your overall cycling performance. Whether you are a seasoned athlete or a beginner, having the right shoe fit and pedal connection can help you achieve your fitness goals more effectively. So, take the time to read the instruction manual, make necessary adjustments, and enjoy the ride with confidence and ease. Happy cycling!
]]>Acrylic paint has long been a favorite medium for artists due to its versatility and vibrant colors. However, when it comes to sealing acrylic paint on surfaces that experience regular use, such as shoes, an extra layer of protection is essential. By sealing your acrylic paint, you can not only preserve the colors and details of your design but also ensure that it remains resistant to water, scuffs, and fading. From choosing the right sealant to applying it correctly, we will guide you through each crucial step, offering useful tips and tricks along the way. So, get ready to unleash your creativity and embark on a journey of preserving your artwork on shoes with our comprehensive guide to sealing acrylic paint.
How to Seal Acrylic Paint on Shoes:
- Prepare your shoes by cleaning them with mild soap and water. Let them dry completely.
- Apply a base coat of acrylic paint to your shoes and let it dry for at least 24 hours.
- Use a brush or sponge to apply an acrylic sealer to your shoes. Make sure to cover the entire surface evenly.
- Allow the sealer to dry for at least 48 hours before wearing or using your painted shoes.
- If desired, apply additional coats of sealer for added protection and durability.
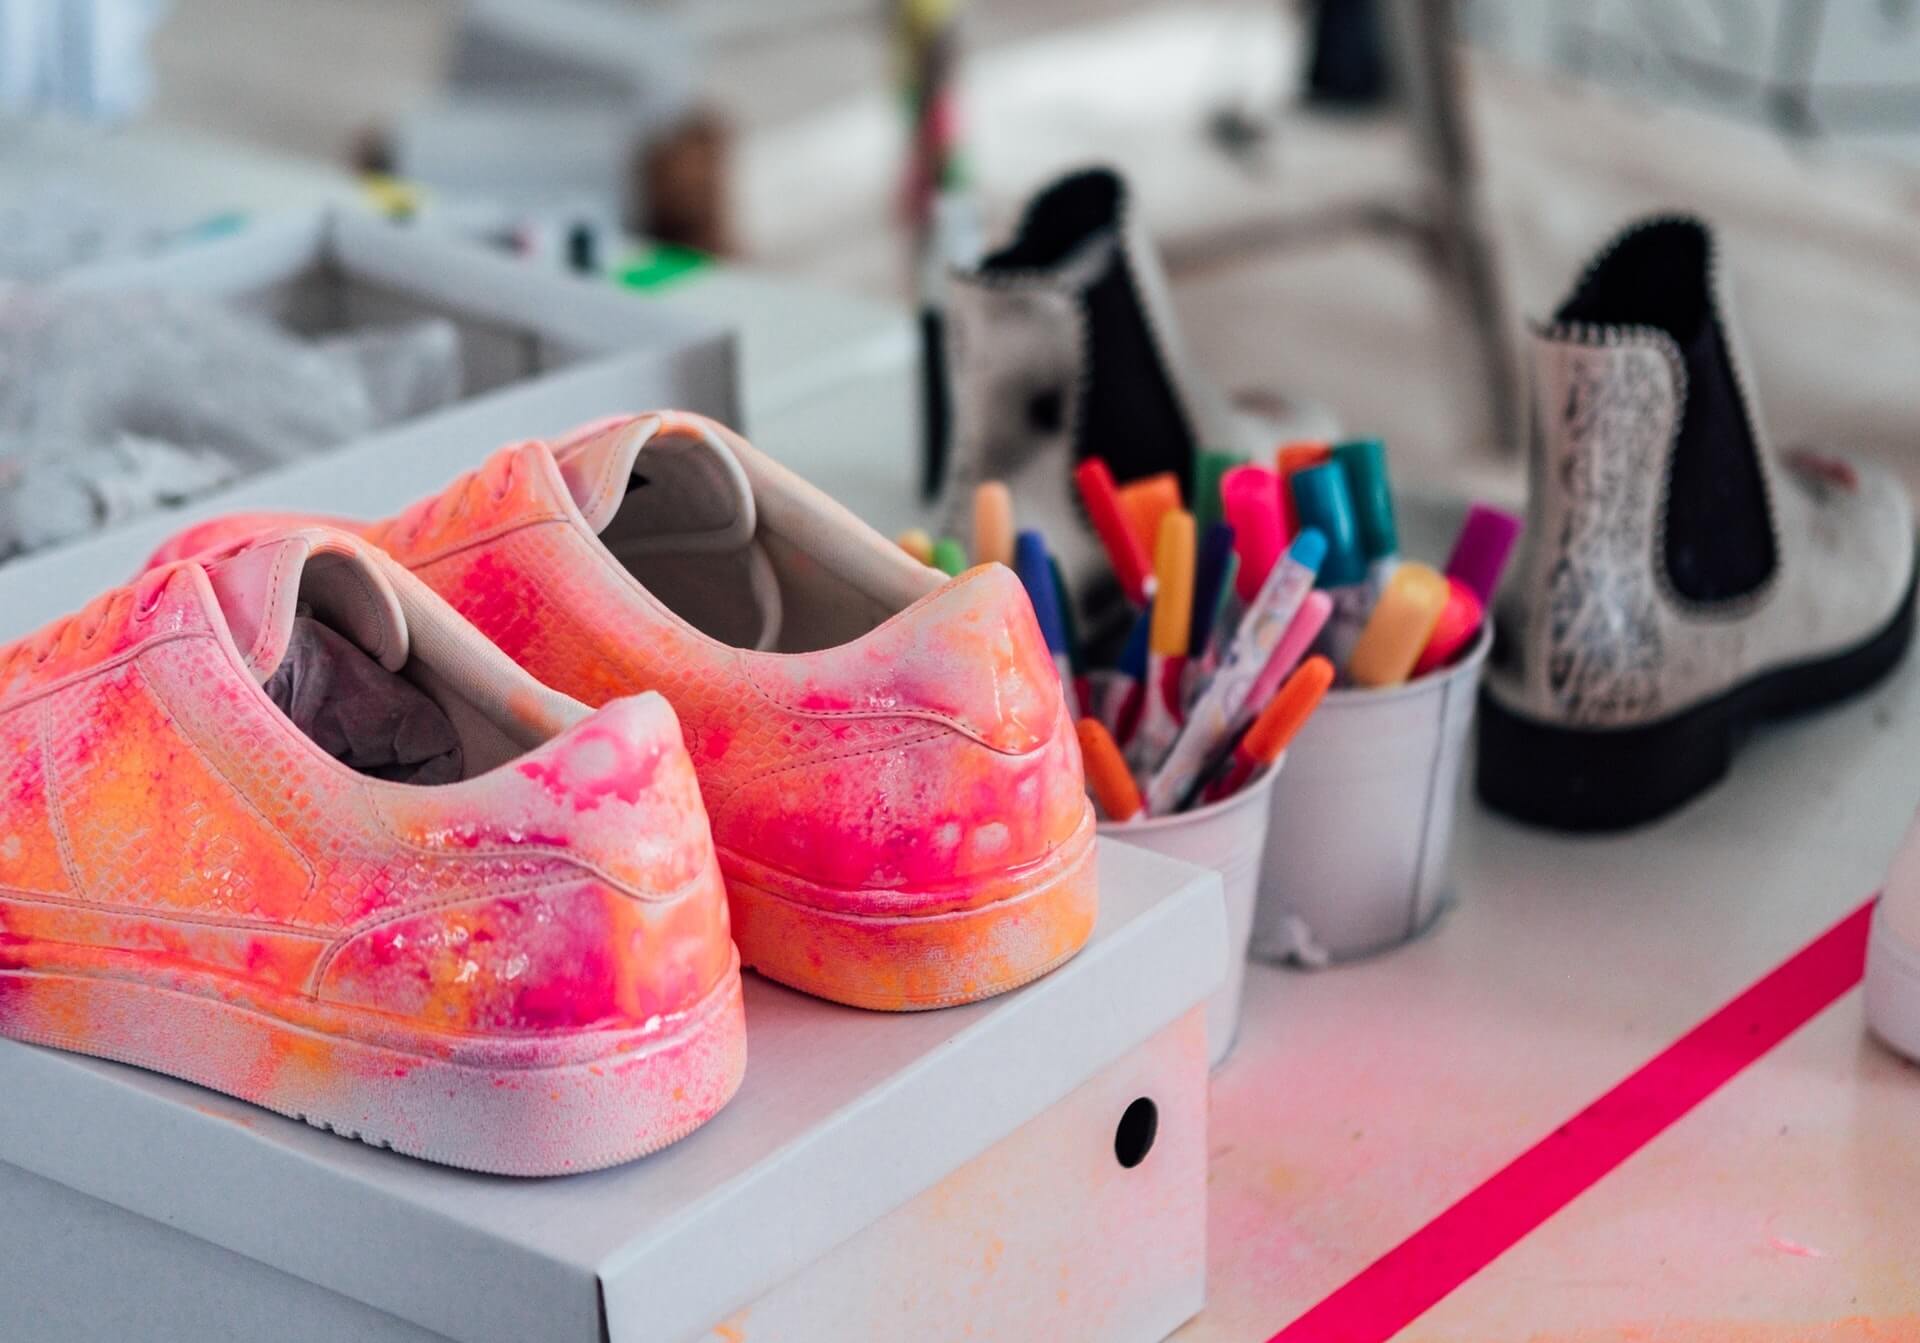
How to Seal Acrylic Paint on Shoes
In this step-by-step guide, you will learn how to properly seal acrylic paint on shoes to ensure the design lasts and remains vibrant for a long time. By following these instructions, you will be able to protect your painted shoes from water damage, scuffing, and fading. Whether you are customizing a pair of sneakers or adding a personal touch to your favorite pair of shoes, sealing the acrylic paint is essential for longevity.
Gather the Necessary Materials
Before you begin the process of sealing acrylic paint on your shoes, make sure you have all the necessary materials at hand. This will ensure a smooth and efficient application. The materials you will need include:
- Acrylic paint in your desired colors
- Paintbrushes in various sizes
- Isopropyl alcohol for cleaning the shoes
- Cotton swabs or a soft cloth
- Acrylic sealant spray or brush-on sealant
- Masking tape or painter’s tape
- Small bowl or palette for mixing paint
- A well-ventilated area to work in
Having all these materials ready will ensure that you can complete the process without any interruptions.
Prepare and Clean the Shoes
Before applying acrylic paint to your shoes, it’s essential to prepare and clean them properly. Start by removing any dirt or debris from the surface of the shoes using a soft cloth or cotton swabs. If there are stubborn stains, you can use isopropyl alcohol to gently clean them. Allow the shoes to dry completely before proceeding to the next step.
Once the shoes are clean and dry, use masking tape or painter’s tape to cover any areas you do not want to paint. This will help create clean lines and prevent colors from bleeding into unwanted areas. Take your time to ensure the tape is applied securely and evenly.
Now that your shoes are prepped and ready, you can move on to the next steps of applying and sealing the acrylic paint. Remember to work in a well-ventilated area and protect the surrounding surfaces from overspray or paint drips.
Applying Acrylic Paint
The first step in applying acrylic paint is to mix your desired colors on a small palette or in a bowl. Use a paintbrush to apply the paint in thin, even layers on the shoes. Start with lighter colors as a base and gradually build up to darker shades or intricate designs. Allow each layer to dry completely before adding another layer of paint.
Take your time during the painting process to ensure precision and accuracy. Use smaller brushes for intricate details and larger brushes for broader areas. If you make any mistakes, don’t worry! You can easily correct them by using isopropyl alcohol and a cotton swab to remove the paint before it dries.
Sealing the Acrylic Paint
Once you are satisfied with the painted design on your shoes and it has dried completely, it’s time to seal the acrylic paint. There are two common methods for sealing acrylic paint on shoes: acrylic sealant spray or brush-on sealant.
If you choose to use an acrylic sealant spray, make sure to shake the can well before applying. Hold the can approximately 6-8 inches away from the shoes and spray in a sweeping motion, making sure to cover the entire painted surface evenly. Allow the sealant to dry completely according to the manufacturer’s instructions.
If you prefer a brush-on sealant, use a clean paintbrush to apply a thin, even layer over the painted design. Be careful not to apply too much pressure or brush strokes, as this can smudge or damage the paint. Allow the sealant to dry completely before considering a second coat if necessary.
Once the sealant has dried, your painted shoes are now protected and ready to be worn. The sealant will help protect the paint from water damage, scuffing, and fading, ensuring that your customized shoes remain vibrant and beautiful for a long time.
Frequently Asked Questions
Here are some commonly asked questions about how to seal acrylic paint on shoes:
Q: What is the best method to seal acrylic paint on shoes?
There are a few different methods you can use to seal acrylic paint on shoes, but one of the most effective ways is to use a clear acrylic sealer spray. This spray creates a protective barrier over the painted surface, helping to prevent the paint from chipping or fading. Make sure to choose a sealer that is specifically designed for use on acrylic paint and follow the instructions on the can for best results. Additionally, you can also use a brush-on sealer or a fabric medium mixed with your acrylic paint for added durability.
It’s important to note that sealing your shoes may alter their appearance slightly, so it’s a good idea to test the sealer on a small, inconspicuous area before applying it to the entire shoe. This way, you can ensure that you’re happy with the final result.
Q: How long should I wait before sealing acrylic paint on shoes?
Before applying a sealer to your painted shoes, it’s crucial to allow the acrylic paint to fully dry. Depending on the thickness of the paint and the environmental conditions, this can take anywhere from a few hours to overnight. It’s recommended to wait at least 24 hours to ensure that the paint is completely dry and cured before sealing it. Sealing the paint too soon can cause it to smudge or become less durable, so it’s best to exercise patience and give it ample time to dry.
Keep in mind that drying times may vary, so it’s always a good idea to refer to the specific instructions provided by the manufacturer of the acrylic paint you’re using.
Q: Can I wash shoes that have been sealed with acrylic paint?
Yes, shoes that have been sealed with acrylic paint can generally be washed, but it’s important to take some precautions to ensure that the paint doesn’t get damaged. When washing, use a mild detergent and cold water, and avoid scrubbing the painted areas vigorously. Instead, gently hand wash the shoes and pat them dry with a soft cloth. Avoid using bleach or harsh chemicals, as these can cause the paint to fade or peel.
It’s worth mentioning that even with proper sealing, the paint on shoes may gradually wear off over time with regular washing and use. To prolong the life of the painted design, it’s best to wash the shoes as gently as possible and avoid excessive friction or rubbing.
Q: Can I wear shoes painted with acrylic paint in the rain?
While acrylic paint is water-resistant when dry, it is not completely waterproof. This means that wearing shoes painted with acrylic paint in heavy rain or submerging them in water for prolonged periods can cause the paint to run or become damaged. If you anticipate rainy weather, it’s advisable to avoid wearing your painted shoes or take appropriate measures to protect them, such as using a waterproof spray specifically designed for fabric or leather.
Applying an additional layer of waterproof sealant can also help improve the water resistance of the paint. However, it’s important to keep in mind that even with these precautions, exposure to excessive moisture over time can still compromise the durability and appearance of the painted design.
Q: How long will the paint on my shoes last after sealing?
The longevity of the paint on your shoes after sealing depends on several factors, including the quality of the paint and sealer used, the type of shoes, and how well they are cared for. Generally, a properly sealed and well-maintained acrylic paint design on shoes can last for a considerable amount of time, even with regular use.
To ensure the longevity of the painted design, it’s advisable to avoid excessive abrasion or rough treatment, as this can cause the paint to chip or peel. Additionally, storing the shoes in a cool and dry place when not in use can help prevent any unnecessary wear and tear. While the paint may eventually show signs of fading or wear, proper sealing can help extend its lifespan and keep it looking vibrant for longer.
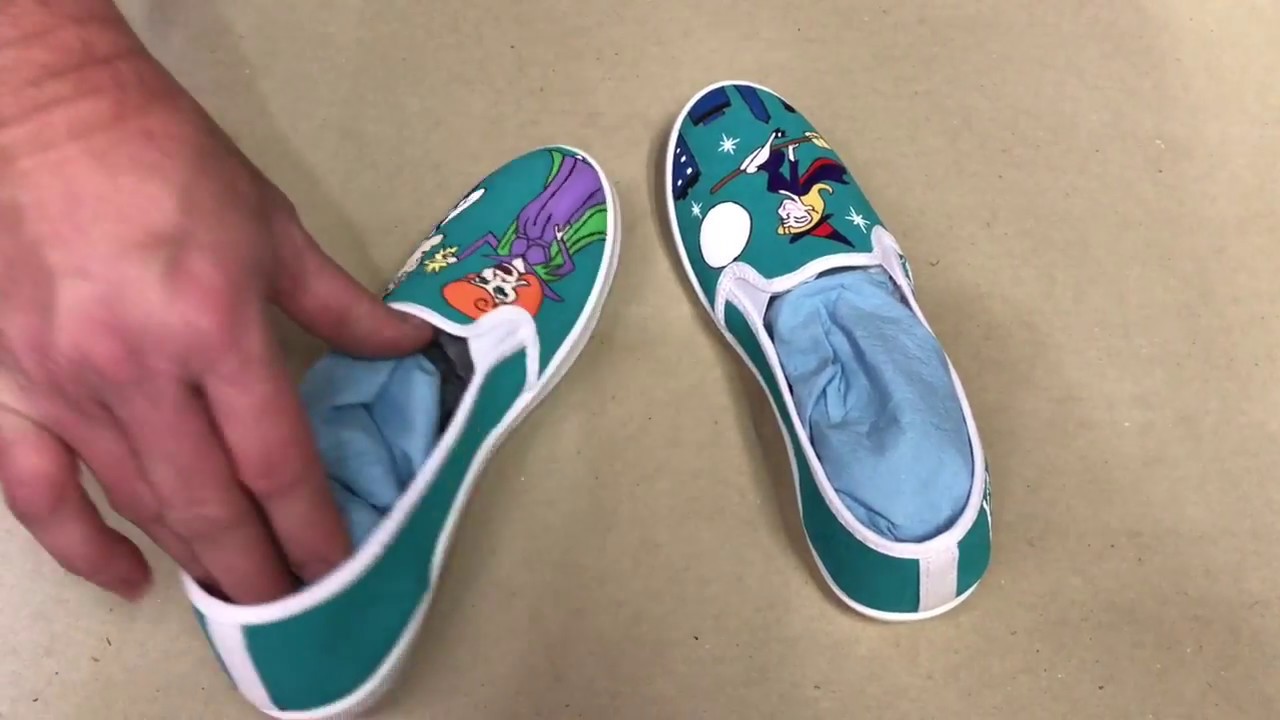
In conclusion, mastering the art of sealing acrylic paint on shoes not only adds a touch of personalization and creativity to your footwear, but also ensures their longevity and durability. By following the steps outlined in this guide, from thorough surface preparation to selecting the right sealant and applying it with precision, you can achieve a professional-looking finish that will withstand the test of time.
Remember, practice makes perfect, so don’t be discouraged if your first attempt doesn’t yield the results you desire. Experiment with different techniques, colors, and sealants to find the combination that best suits your style and preferences. Whether you’re revamping an old pair of shoes or starting with a blank canvas, sealing acrylic paint on shoes opens up a world of endless possibilities for expressing your individuality. So, grab your brushes, unleash your creativity, and embark on this exciting journey of transforming your footwear into unique works of art.
]]>When it comes to removing yellowing from shoe soles, there is no shortage of methods and products on the market. However, many of these options can be expensive or require a trip to the store. That’s why we’ve compiled a list of tried-and-true techniques that you can easily implement using common household items. From baking soda to hydrogen peroxide, we will walk you through each step, providing clear instructions and tips to ensure successful results. So, whether you’re a sneakerhead looking to revive your kicks or simply want to extend the lifespan of your trusty shoes, this guide is your go-to resource for achieving bright, white soles in no time. Get ready to step out in style!
How to remove yellowing from shoe soles at home:
- Prepare a mixture of equal parts baking soda and hydrogen peroxide.
- Apply the mixture to the yellowed areas of the shoe soles.
- Gently scrub the mixture into the soles using a soft-bristled toothbrush.
- Leave the mixture on the soles for about 30 minutes.
- Rinse the soles thoroughly with warm water.
- Repeat the process if necessary.

How to Remove Yellowing from Shoe Soles at Home
Introduction:
Yellowing of shoe soles is a common issue that many people face. Over time, exposure to sunlight, dirt, and other elements can cause the soles of your favorite shoes to turn yellow. Luckily, there are simple and effective ways to restore the original color of your shoe soles right at home. In this article, we will guide you through step-by-step instructions on how to remove yellowing from shoe soles using common household items.
Step 1: Gather the necessary supplies
Before you begin the yellowing removal process, it is important to gather all the supplies you will need. Here’s what you’ll need:
- A soft-bristle toothbrush
- Baking soda
- Hydrogen peroxide
- A small bowl
- Water
Make sure you have all these items readily available before moving on to the next step.
Step 2: Create a cleaning solution
In a small bowl, mix equal parts baking soda and hydrogen peroxide to create a paste-like consistency. Add a few drops of water if needed to achieve the desired texture. Stir the mixture well until it is thoroughly combined.
This cleaning solution is highly effective in removing yellow stains from shoe soles due to the natural cleaning properties of baking soda and the bleaching effect of hydrogen peroxide.
Step 3: Apply the cleaning solution
Using the soft-bristle toothbrush, apply the cleaning solution onto the yellowed areas of the shoe soles. Make sure to cover the entire affected area with a thin layer of the paste. Gently scrub the soles in circular motions, applying a bit of pressure to effectively remove the yellow stains.
Continue scrubbing until you notice the yellowing starting to fade away. Be patient, as it may take a few minutes of scrubbing to achieve the desired results.
Step 4: Rinse and dry
Once you are satisfied with the results, rinse the shoe soles with warm water to remove any remaining cleaning solution. Ensure that all the residue is thoroughly washed off.
After rinsing, pat the soles dry with a clean towel. Avoid using excessive force while drying to prevent any damage to the shoe material.
Step 5: Repeat if necessary
If the yellowing is still visible after the first attempt, you can repeat the cleaning process. Apply the cleaning solution once again and repeat steps 3 and 4 until you achieve the desired outcome.
It is important to note that excessive use of this cleaning method may cause slight fading of the shoe color. Therefore, it is recommended to perform a patch test on a small inconspicuous area before applying the solution to the entire sole.
Step 6: Maintain cleanliness
To prevent future yellowing of your shoe soles, it is essential to keep them clean and well-maintained. Regularly wipe off any dirt or debris from the soles using a damp cloth. Avoid leaving your shoes in direct sunlight for extended periods, as this can accelerate yellowing.
Additionally, storing your shoes in a cool, dry place can help prolong their lifespan and maintain their original color.
Conclusion:
By following these simple steps, you can effectively remove yellowing from your shoe soles without the need for expensive cleaning products or professional services. Remember to always be gentle while scrubbing and perform a patch test before applying any cleaning solution to your shoes. With a little effort and the right technique, your shoe soles will be restored to their former glory.
Frequently Asked Questions
If you are looking to remove yellowing from your shoe soles at home, we have compiled a list of frequently asked questions to help you. Below, you will find answers to some common queries about this topic.
Q: What causes yellowing on shoe soles?
There are a few factors that can contribute to yellowing on shoe soles. One of the main culprits is oxidation, which occurs when the rubber in the soles reacts with air and moisture. Additionally, exposure to sunlight and certain chemicals can also cause yellowing. It is important to note that the type of material used in the soles can also play a role in the yellowing process.
To effectively remove yellowing, it is essential to understand the cause and choose the appropriate method for cleaning and restoring your shoe soles.
Q: How can I prevent yellowing on my shoe soles?
To prevent yellowing on your shoe soles, there are a few steps you can take. First, try to avoid exposing your shoes to direct sunlight for extended periods. Ultraviolet (UV) rays can accelerate the yellowing process. Additionally, store your shoes in a cool, dry place to minimize moisture exposure. Regularly cleaning your shoe soles and using protective sprays or coatings can also help prevent yellowing.
Remember, prevention is key in maintaining the appearance and longevity of your shoe soles.
Q: How can I remove yellowing from white rubber shoe soles?
Removing yellowing from white rubber shoe soles can be achieved with a few simple steps. Start by mixing a solution of equal parts water and hydrogen peroxide. Apply the mixture to the yellowed areas of the soles using a soft brush or cloth. Gently scrub the affected areas, then rinse with clean water. For stubborn stains, you may need to repeat the process or try using a specialized rubber sole cleaner.
After cleaning, allow the shoe soles to air dry completely before wearing them again. This method should help restore the whiteness of your rubber shoe soles.
Q: Can I use bleach to remove yellowing from shoe soles?
While bleach may seem like a quick solution to remove yellowing from shoe soles, it is not recommended. Bleach is a harsh chemical that can damage the rubber and other materials used in the soles. It may cause discoloration or even weaken the structure of the soles, compromising their durability.
Instead of bleach, opt for safer alternatives, such as hydrogen peroxide or specialized rubber sole cleaners, to effectively remove yellowing without risking damage to your shoes.
Q: Are there any natural remedies to remove yellowing from shoe soles?
Yes, there are natural remedies that can help remove yellowing from shoe soles. One popular option is using a mixture of baking soda and lemon juice. Create a paste by combining these two ingredients and apply it to the yellowed areas. Allow the paste to sit for a few minutes, then scrub gently with a brush or cloth. Rinse off the mixture with clean water and let the soles air dry.
Remember, natural remedies may not be as potent as commercial cleaners, so you may need to repeat the process or use them in combination with other methods for optimal results.

How to UNYELLOW & RESTORE Yellowed Shoe Soles at HOME! (BEST WAY!)
In conclusion, learning how to remove yellowing from shoe soles at home is a cost-effective and convenient solution for restoring the original look of your footwear. By following the simple steps outlined in this guide, you can effectively tackle the common problem of yellowing soles, allowing your shoes to regain their pristine appearance. Not only does this method save you money from purchasing new shoes, but it also allows you to take pride in maintaining and preserving your beloved footwear collection.
By taking the time to care for your shoes and properly clean them, you can extend their lifespan and keep them looking their best. Remember to always test any cleaning solutions on a small, inconspicuous area of the sole before applying it to the entire surface. With a little patience and effort, you can successfully remove the yellowing and bring your shoe soles back to life, ensuring that your shoes continue to make a stylish statement wherever you go. So, get ready to give your shoes a fresh and vibrant look, and step out with confidence knowing that your footwear is in top-notch condition.
]]>